In Part 1, you installed Claude Desktop and Claude Code. Now let’s use them.
If you followed Part 1 of this guide, you have Claude ready to go — either through the Desktop app’s Code tab or through the CLI in your terminal. Both work identically for what we’re about to do.
In the next twenty minutes, you’re going to do three things: design an app by talking to Claude, build it with Claude Code, and learn a framework for teaching yourself anything else — no future tutorial needed.
Let’s go.
Step 1: Design Your App by Talking
Before you write a single line of code — before you even open Claude Code — start a regular conversation with Claude. Use Claude Desktop (the Chat tab), Claude.ai in your browser, or even the mobile app. The goal here is to think through what you want to build.
We’re going to build a personal expense tracker. It’s simple enough to build in one sitting, useful enough that you’ll actually open it again, and visual enough that you’ll feel the satisfaction of seeing it work.
Open a new conversation with Claude and try something like this:
I want to build a simple personal expense tracker that runs in my web browser. I’m a complete beginner — I’ve never built an app before. Help me think through what features it should have and what it should look like. Keep it simple — I want something I can build in a single file.
Claude will respond with ideas. It might suggest features like adding expenses with a date, category, and amount, a running total of your spending, a simple chart showing spending by category, and the ability to delete entries.
This is your design conversation. Push back. Ask questions. Say “that’s too complicated, simplify it” or “what about adding a way to filter by date?” or “I don’t understand what you mean by ‘localStorage’ — explain it like I’m five.”
This conversational design phase is genuinely valuable. You’re doing what professional product designers do — defining requirements — except you have a patient collaborator who never sighs when you change your mind.
Save this conversation or take notes. The design decisions you make here become the instructions you’ll give Claude Code in the next step.
Step 2: Build It
Now switch to Claude Code. Open either:
- The Code tab in Claude Desktop — click Code at the top, select the folder where you want your project
- Your terminal — navigate to your project folder and type
claude
If you’re using the terminal and you haven’t created a project folder yet, here’s how:
macOS / Linux:
mkdir ~/my-expense-tracker
cd ~/my-expense-tracker
claude
Windows (PowerShell):
mkdir $HOME\my-expense-tracker
cd $HOME\my-expense-tracker
claude
The mkdir command creates a new folder. The cd command moves you into it. That’s two of the most useful terminal commands you’ll ever learn — and you just learned them.
Give Claude Code Your Instructions
Now type your request. Based on your design conversation, something like:
Build me a simple expense tracker as a single HTML file. It should let me add expenses with a description, category (like Food, Transport, Entertainment, Bills, Other), and amount. Show all my expenses in a list with a delete button on each one. Show the total amount spent at the top. Store everything in the browser so it persists when I close the tab. Keep the design clean and modern — dark background, simple layout.
Hit Enter. Watch what happens.
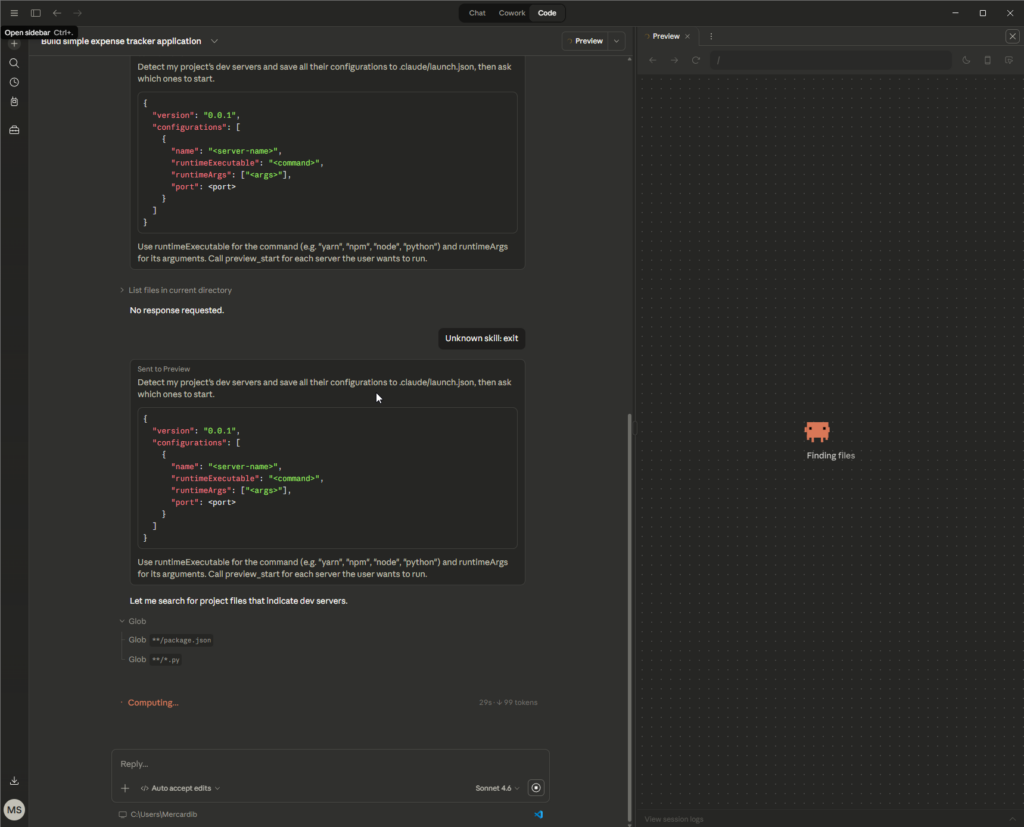
Claude Code will start creating your file. You’ll see it writing HTML, CSS, and JavaScript — the three languages that make websites work. It will ask for your permission before creating or modifying files. Say yes.
When it’s done, you’ll have a file called something like index.html in your project folder.
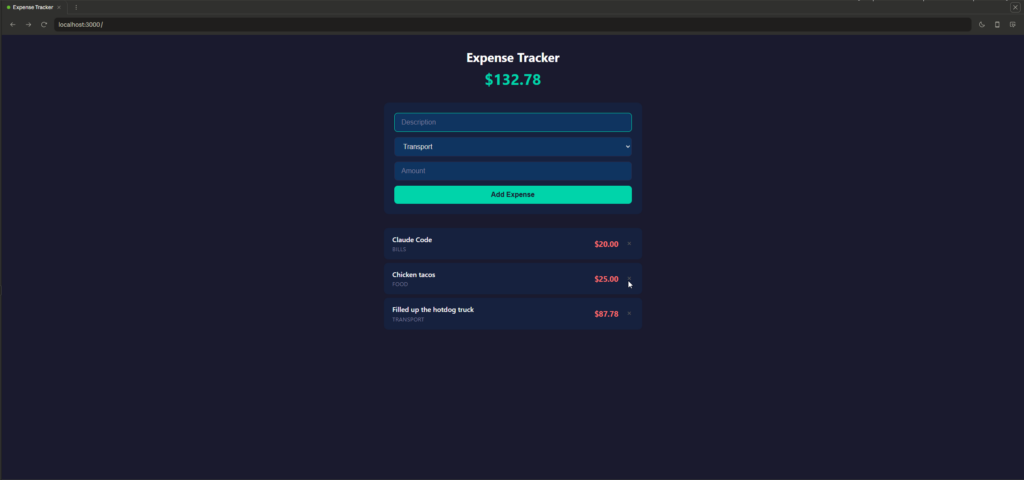
Open Your App
Find that file and double-click it. It opens in your web browser. You have a working expense tracker. Add some expenses. Watch the total update. Delete one. It’s real. You built that.
Take a moment with that. You just went from “I’ve never built an app” to “I have a working app” in under five minutes of actual building.
Iterate
Your app works, but maybe you want to improve it. Go back to Claude Code and try:
Add a simple bar chart at the bottom that shows spending by category. Use different colors for each category.
Or:
Add a way to export my expenses as a CSV file that I can open in Excel or Google Sheets.
Or:
The delete button is too easy to accidentally click. Add a confirmation before deleting.
Each request generates a change. Claude Code will show you what it wants to modify, you approve it, and your app updates. Refresh your browser to see the changes.
This is the development loop: describe what you want → Claude writes it → you review → you refine. It’s a conversation, not a coding exercise.
Step 3: Understand What Just Happened
Let’s briefly demystify what Claude Code actually created, because understanding the basics makes you a better collaborator.
Your expense tracker is a single HTML file. Inside it, there are three layers working together:
HTML is the structure — the skeleton. It defines what elements exist on the page: the input fields, the buttons, the list of expenses, the total display. Think of it as the blueprint of a house.
CSS is the style — the paint and furniture. It controls what everything looks like: colors, fonts, spacing, layout. It’s why your app looks clean instead of like a 1997 GeoCities page.
JavaScript is the behavior — the electricity and plumbing. It makes things happen: when you click “Add Expense,” JavaScript takes the data from the input fields, adds it to the list, updates the total, and saves everything to your browser’s storage.
Claude Code wrote all three of these for you, bundled them into one file, and saved it to your project folder. Every web app in the world — from Gmail to Twitter — uses these same three languages. The scale and complexity are different, but the foundation is identical.
A Note About Permissions
You may have noticed that Claude Code asked for your approval before creating files. This is intentional. Claude Code’s permission system means you’re always in control — it won’t silently change things without telling you. As you get more comfortable, you can adjust this (the Desktop app has an “Auto accept edits” mode), but starting with explicit approval is smart. It forces you to see what’s changing.
A Note About Git
Behind the scenes, Claude Code uses a tool called Git to track every change it makes. Git is version control — it remembers what your code looked like at every point in time. This means if Claude makes a change you don’t like, you can go back. You don’t need to learn Git right now, but know that this safety net exists.
The Self-Teaching Framework
This is the most important section of this guide. Everything above was setup. This is the part that makes you independent.
You will run into things you don’t know how to do. That’s not a problem — it’s the entire point. The question isn’t “do I know how to do this?” It’s “can I figure out how to do this?” And with Claude as a collaborator, the answer is almost always yes.
Here’s the framework. Every prompt you write to learn something new should have three parts:
1. Role — Tell Claude Who to Be
Start your prompt by giving Claude a role. This isn’t magic; it’s focus. It tells Claude what kind of expertise to draw on and what level of detail to provide.
Examples:
- “You are an expert web developer who specializes in teaching beginners.”
- “You are a patient coding instructor explaining concepts to someone who has never programmed before.”
- “You are a senior software engineer reviewing a junior developer’s first project.”
2. Context — Tell Claude Where You Are
Give Claude the specifics of your situation. What are you working on? What tools are you using? What do you already know? What have you already tried?
Examples:
- “I’m working on a personal expense tracker built as a single HTML file. I built it with Claude Code. I’m a complete beginner.”
- “I’m using Claude Code on a Mac. I’ve only been coding for a week.”
- “I just finished building my first app and I want to understand what the code actually does.”
3. Request — Tell Claude What You Want
Be specific. “Help me” is vague. “Help me add a search bar that filters expenses by description, and explain each step as you go so I understand what’s happening” is actionable.
Putting It Together
Here are example prompts for common situations you’ll encounter. Use these as templates — swap in your own details:
When you want to add a feature:
You are an expert web developer who teaches beginners. I’m working on a personal expense tracker (single HTML file, uses localStorage). I want to add a way to set a monthly budget and show a progress bar that fills up as I add expenses. Walk me through how to do this and explain what each piece of code does.
When something breaks:
You are a patient debugging instructor. I’m a beginner using Claude Code. My expense tracker was working fine, but after I added a chart feature, the “Add Expense” button stopped working. Here’s my code: [paste the file or let Claude Code read it]. Help me find and fix the problem, and explain what went wrong so I can avoid it next time.
When you don’t understand a concept:
You are a patient coding instructor. I keep seeing the term “API” in tutorials and conversations about programming. I’m a complete beginner who just built their first HTML app. Explain what an API is, why I’d use one, and give me a simple real-world analogy. Then show me a tiny example I could add to my expense tracker.
When you want to level up:
You are a senior developer mentoring a junior. I’ve been building small HTML/JavaScript apps with Claude Code for a few weeks. What should I learn next to start building more serious applications? Give me a learning roadmap with concrete steps — not a list of buzzwords. Focus on what’s practical, not what’s trendy.
When you want to learn a new tool:
You are an expert developer who’s great at explaining things. I want to understand what Node.js is, why it exists, and whether I need it for my projects. I’m a beginner who currently builds single-file HTML apps. Explain it simply, then tell me when I’d actually need to install it versus when I can skip it.
The Key Insight
Notice what all of these prompts have in common: they’re specific, they provide context, and they ask for explanation alongside action. This is what separates a frustrating AI interaction from a productive one.
Claude doesn’t have your context unless you give it. The more clearly you describe where you are, what you’re trying to do, and what you already know, the more useful the response will be. This isn’t a limitation of AI — it’s how communication works between humans too. The best collaborators are the ones who tell you what they need.
Giving Claude Project Memory with CLAUDE.md
One quick tip before we wrap up. As your project grows, you can create a file called CLAUDE.md in your project folder that gives Claude Code persistent instructions — context it will read every time you start a session in that directory.
For your expense tracker, you might create a CLAUDE.md that says:
# Expense Tracker Project

This is a beginner project — a single-file HTML expense tracker.
- Keep everything in one HTML file (embedded CSS and JS)
- Use localStorage for data persistence
- Dark theme with clean, modern design
- I'm a beginner — explain changes when you make them
- Don't add complexity without asking me first
Claude Code will read this file automatically every time you open it in that folder. It’s like leaving a note for your collaborator so they remember your preferences.
Where to Go Next
You’ve installed the tools, built a working app, and learned how to teach yourself. Here’s where to go from here:
Official resources:
- Claude Code documentation — comprehensive reference for everything Claude Code can do
- Claude Code terminal guide — Anthropic’s own beginner-friendly terminal walkthrough
- Claude Code quickstart — a guided first session
Extensions and integrations:
- VS Code extension — if you want to graduate from the terminal to a proper code editor, Claude Code has a VS Code extension. Search “Claude Code” in the VS Code marketplace.
- JetBrains plugin — same idea, for IntelliJ and other JetBrains IDEs
- Desktop extensions — Claude Desktop supports extensions for connecting to your local files, browser, and other apps. Explore these in Settings → Extensions.
More from TemperatureZero:
- Our methodology article on working with Claude as an infrastructure tool covers how TZ itself is built with Claude workflows
Bottom Line
You just went from zero to a working app. The terminal isn’t scary — it’s a text box where you type instructions instead of clicking buttons. Claude Code is a collaborator, not a magic wand — the better you describe what you want, the better the results.
The most underrated skill in AI-assisted development isn’t knowing code. It’s knowing how to describe what you want clearly, ask the right questions, and iterate on the results. You’ve been doing that your entire life. You just didn’t know it was a job qualification.
Start with something small. Build something you’ll actually use. Break it. Fix it with Claude’s help. Build something slightly bigger. Repeat.
The twenty-dollar Pro plan gives you a collaborator who will write code at 2 AM without complaint, explain every single line if you ask, and never once suggest you should have known better. That’s a remarkable tool. Use it.
This is Part 2 of a two-part guide. Part 1: Setup covers installing Claude Desktop and Claude Code on Mac, Windows, and Linux.

AI-generated editorial illustration · TemperatureZero · April 1, 2026
Keep reading the signal
Get the Daily Signal — a concise briefing on what actually matters in AI and the systems around it.
Subscribe FreeContinue the archive